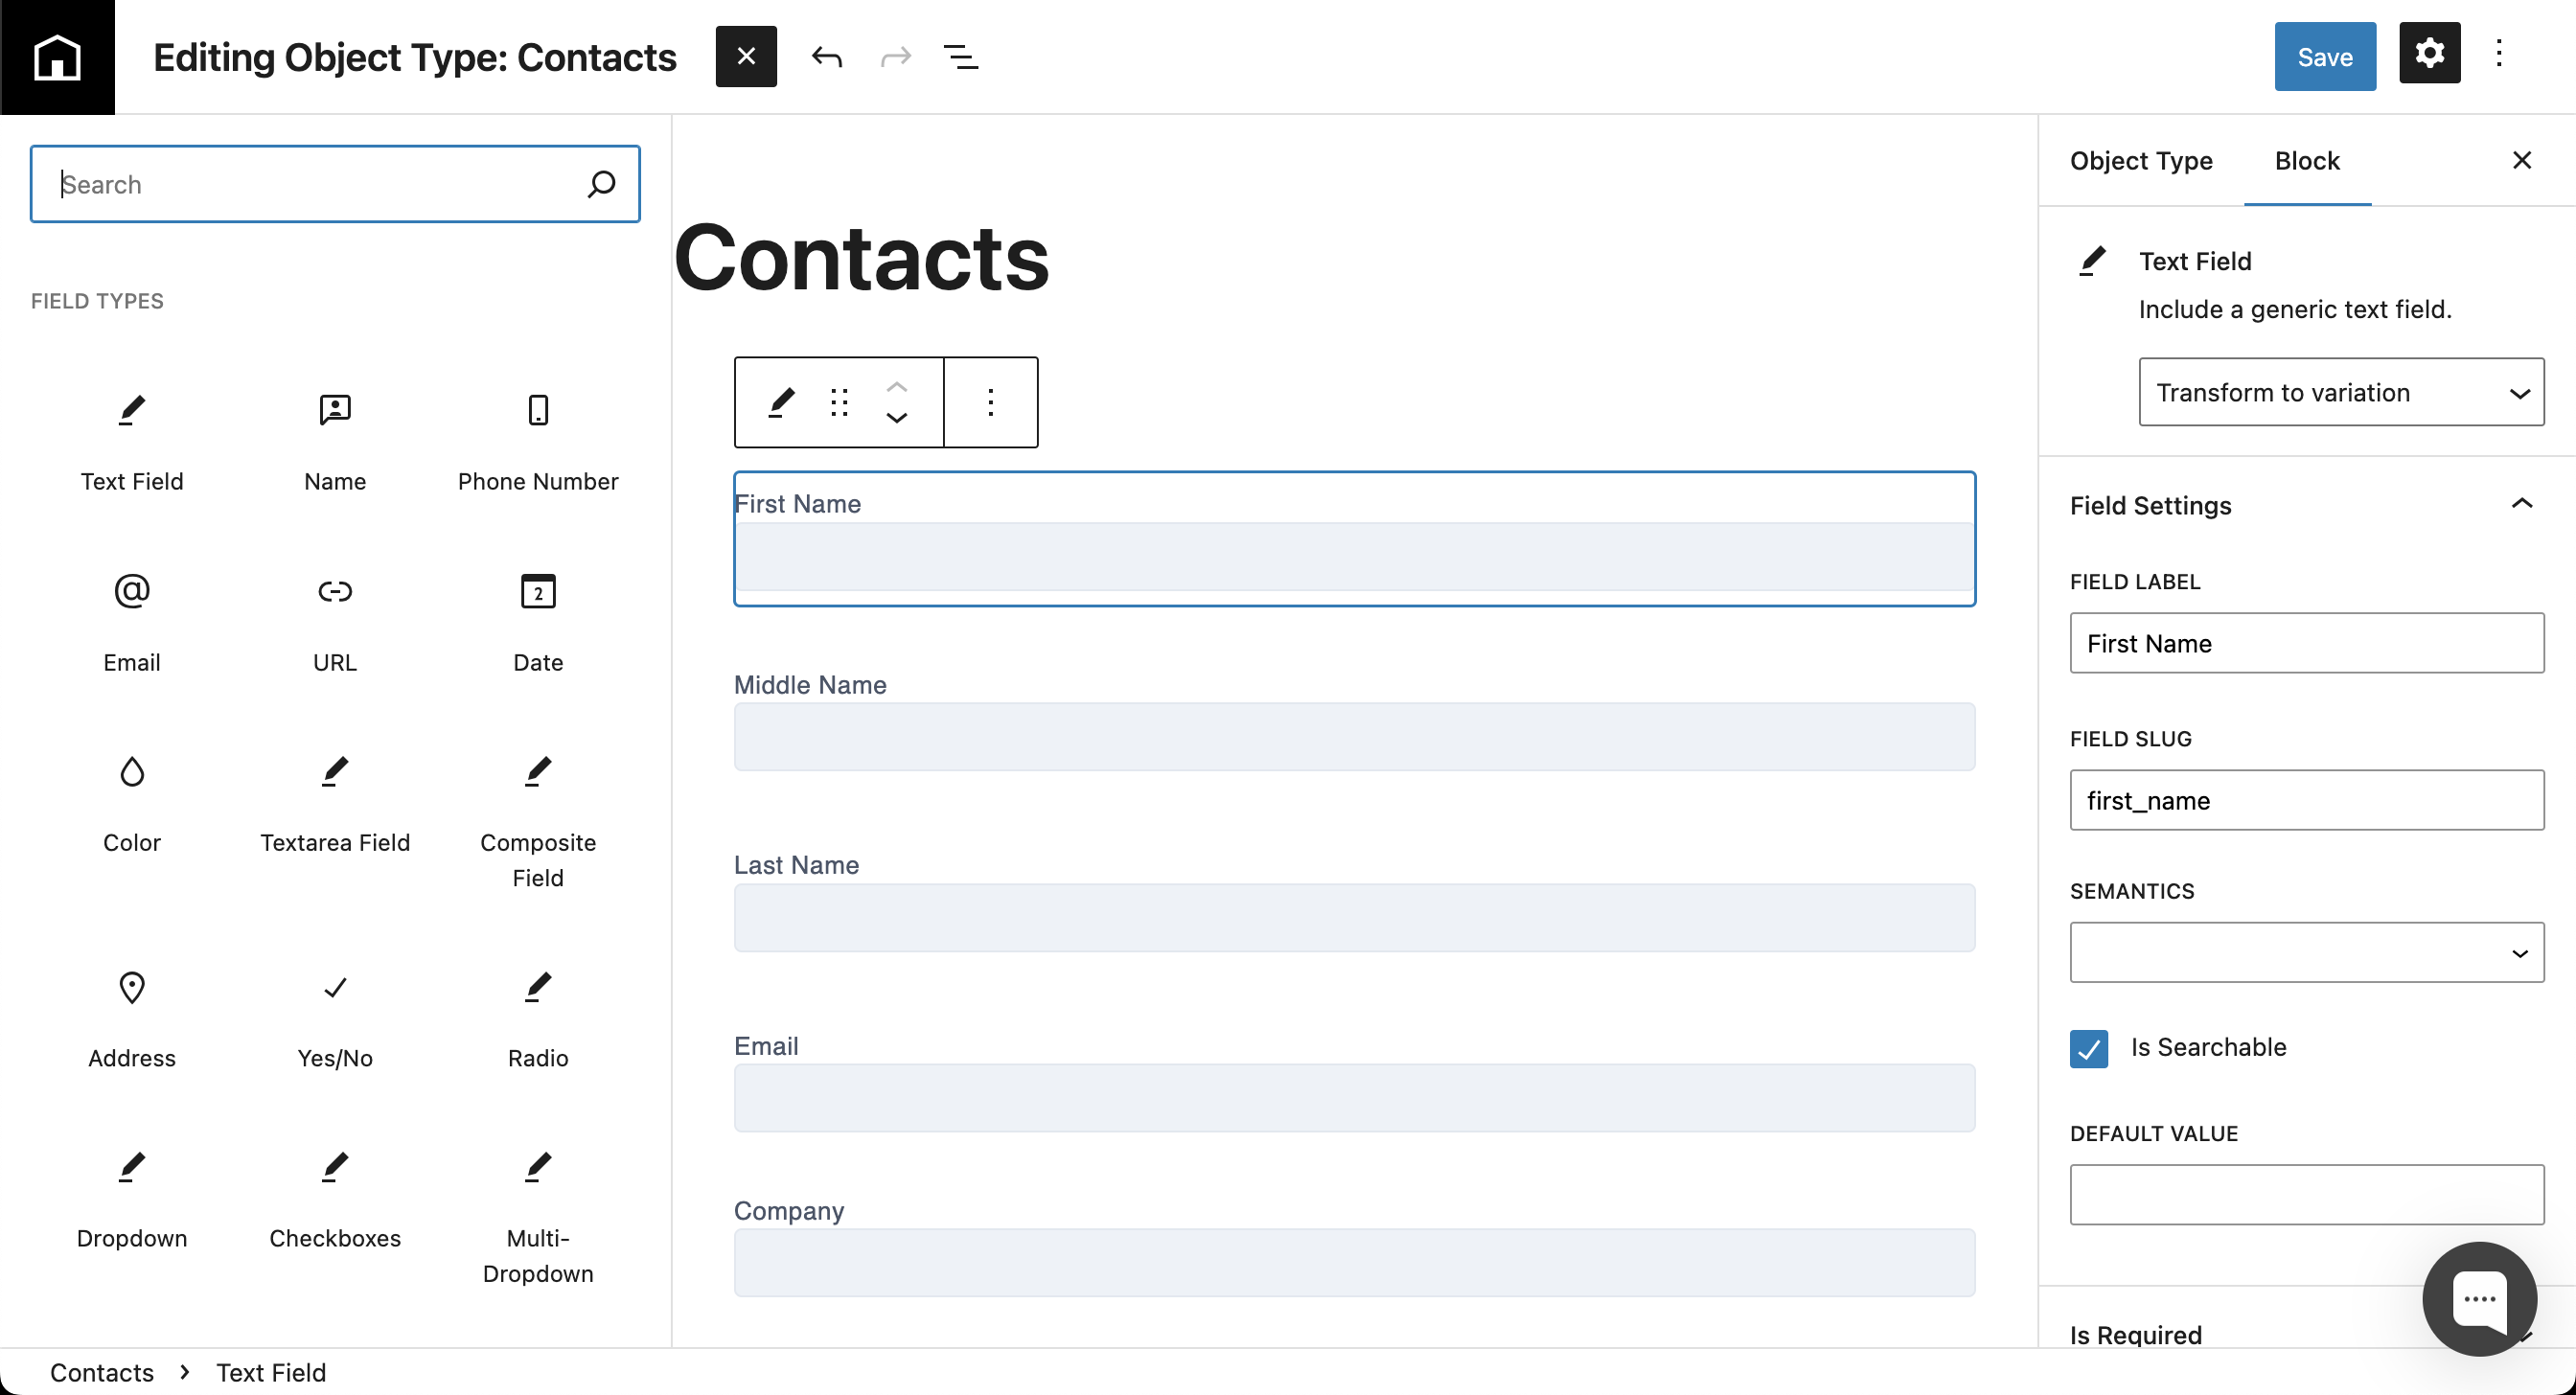
In Engine Awesome, fields form the core building blocks of your application’s data structure. Fields are the individual components that make up the objects in your application, defining what kind of data you can collect and store. Whether it’s a simple text input, a date, or a more complex field, each field provides structure to your application’s data.
This tutorial will walk you through adding a Text Field—one of the simplest yet most commonly used field types in Engine Awesome. We’re going to add a “Middle Name” field to our “Contact” object.
Navigate to the Objects Screen
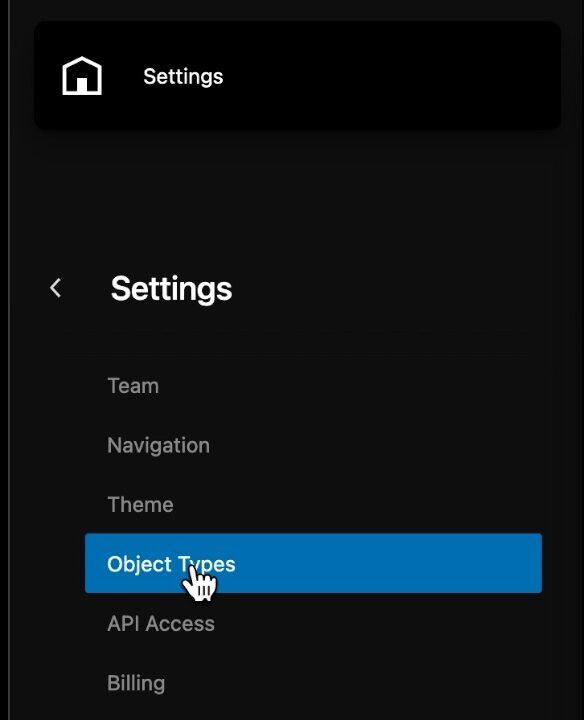
- From the Engine Awesome dashboard, click on “Objects” in the left-hand menu. This will display a list of all your objects.
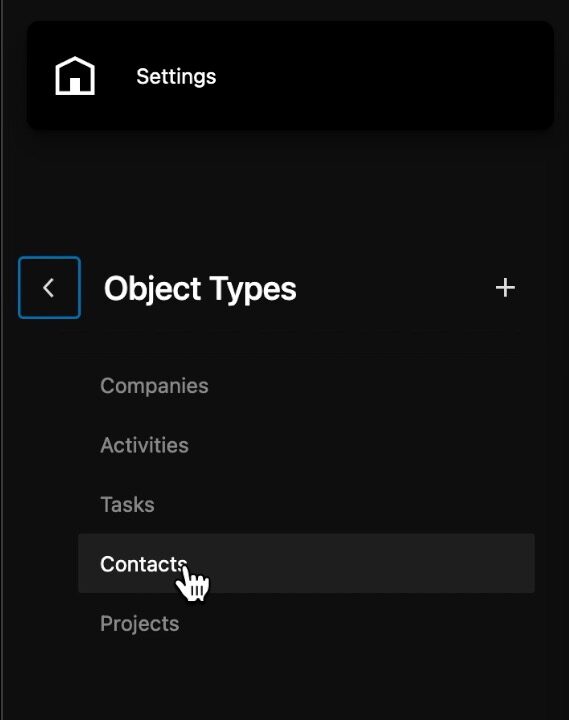
- Choose the object you want to add the field to (for example, “Contacts”).
Open the Block Inserter
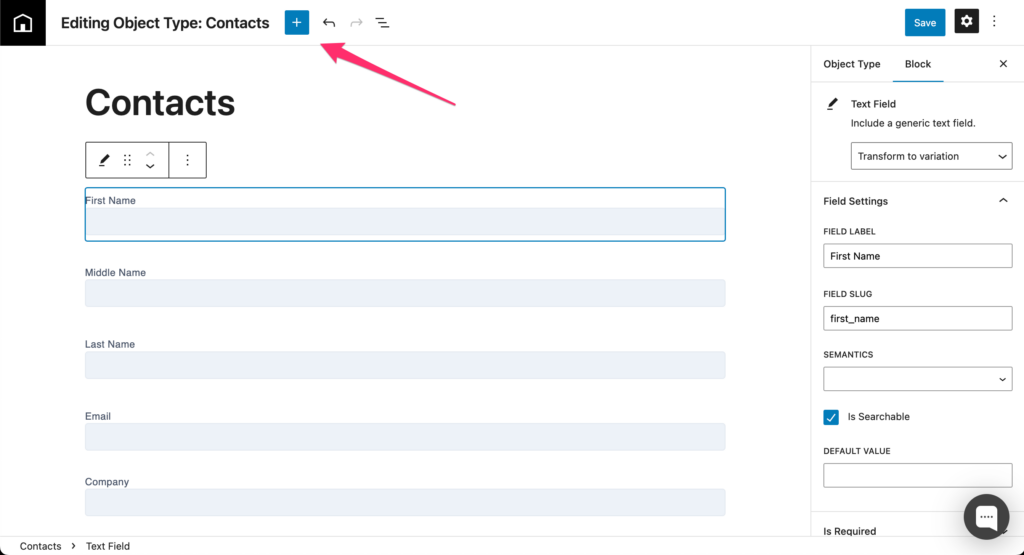
Once you’re in the selected object, click on the “+” at the top. This is the block inserter.
Here is a list of all the blocks you can add to your Object. Choose “Text Field” and drag it over to the list on the right. It doesn’t matter where you place this field in the list.
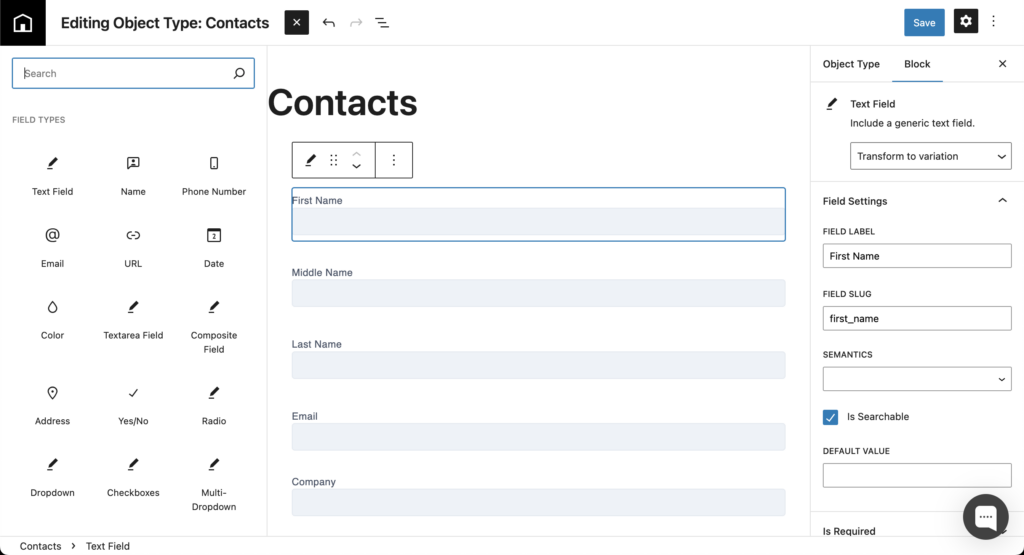
Configure the Text Field
Make sure the tab on the right side of the screen is set to “Block”. Now the block settings are being shown.
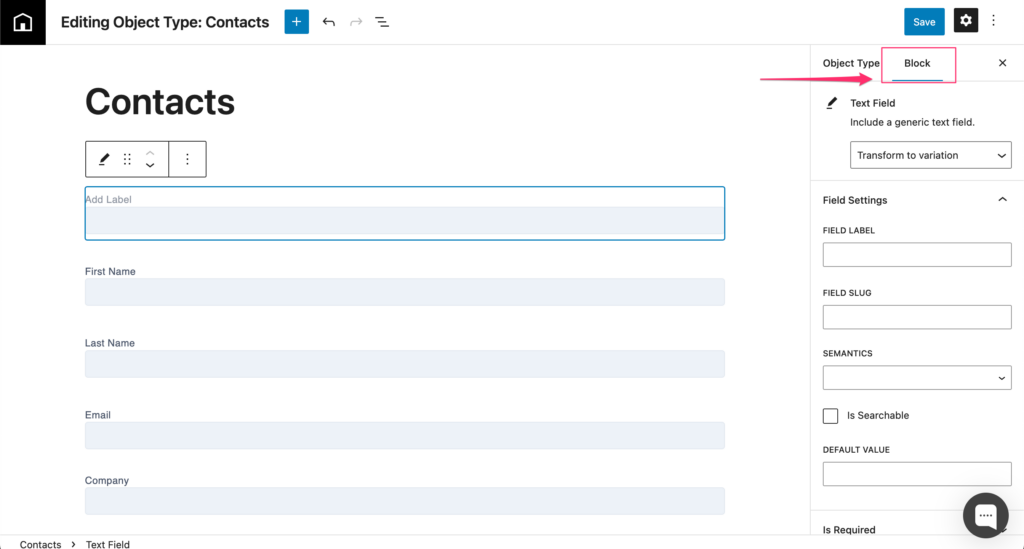
Field Label: Give your text field a descriptive name. For example, “First Name”. You can add this label on the actual field by clicking on “Add Label”, or in the Block settings under “Field Label”. Type “Middle Name” in this field.
Field Slug: The slug is a unique identifier for your field, automatically generated based on the name. You can edit it if needed, but be careful as it is used in integrations. The maximum amount of characters that can be used is 20. This field will automatically populate when you save, or you can enter a value like “middle_name“
Semantics: This allows you to assign a specific purpose or context to your text fields. For example, if the field. stores a person’s name or email address, selecting the appropriate semantic helps the system understand its context better. Click the dropdown and choose “Name: Middle“.
Is Searchable: Toggle this on if you want this field to be indexed and searchable within your application. This is used when you want to query on this field data.
Default Value: You can set a default value for the text field, which will be auto-populated unless edited.
Required Field: If this field must be filled for every record, enable this option.
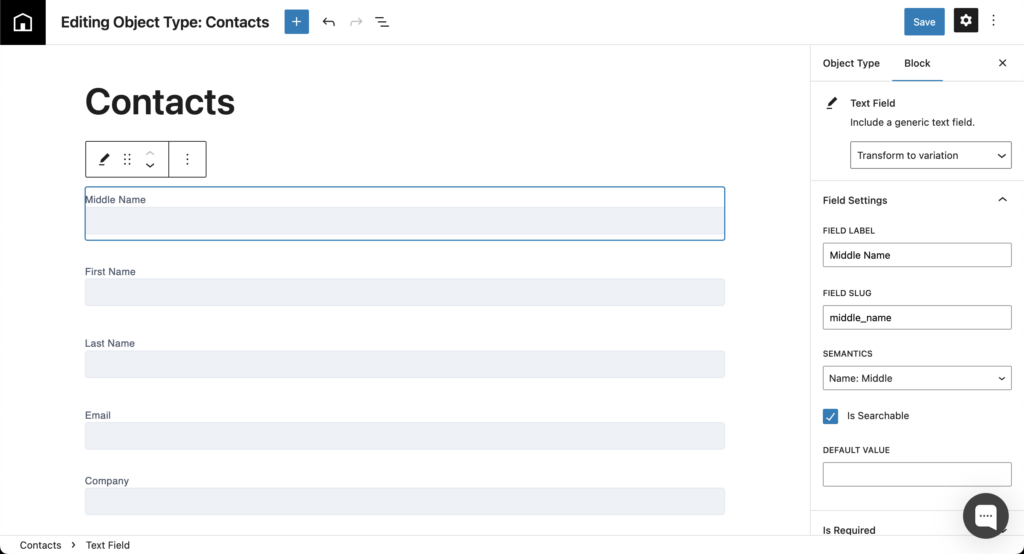
Save the Field
- Once you have configured the settings, click the “Save” button. The text field will now appear in the list of fields for this object.
Switch to a Layout view
- Click on “Object Type” in the right column, which will now bring up the settings for your Object. In this case, Contacts.
- Towards the bottom you will see all your layouts. You can edit one, or create a new one.
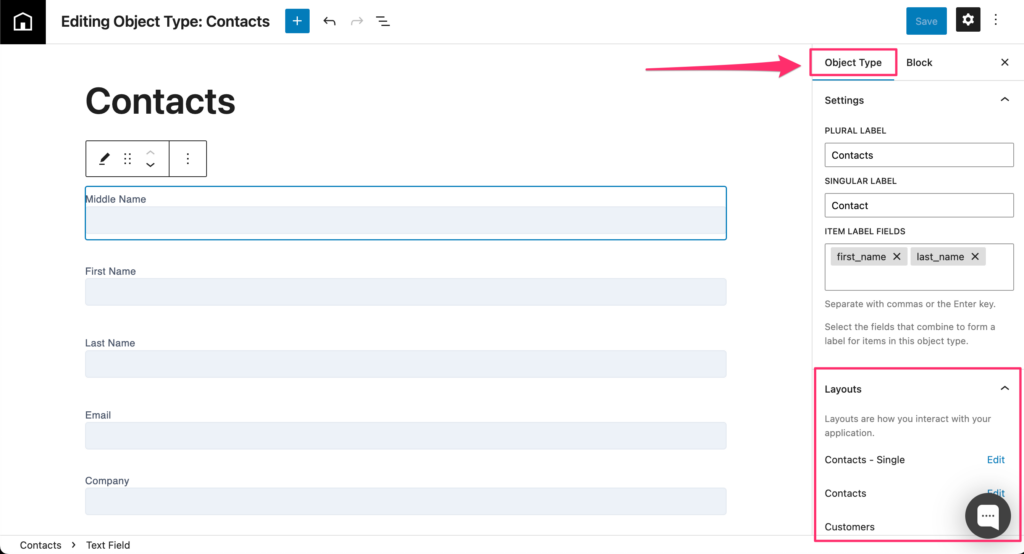
Add the Field to a Layout
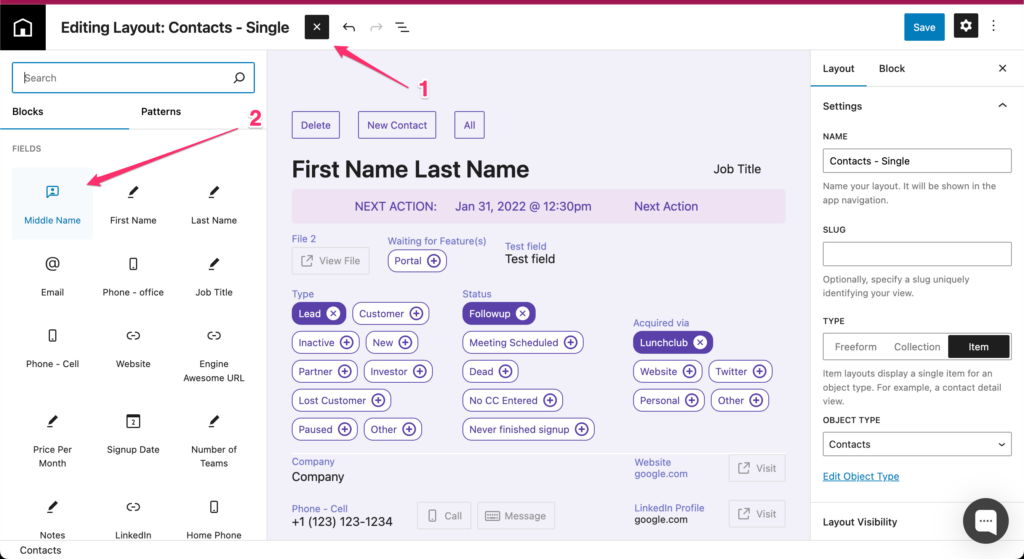
Once you are in your Layout, click on the blue “+” to bring up the block inserter. The inserter on the Layout page now shows all the fields you created on the Object page.
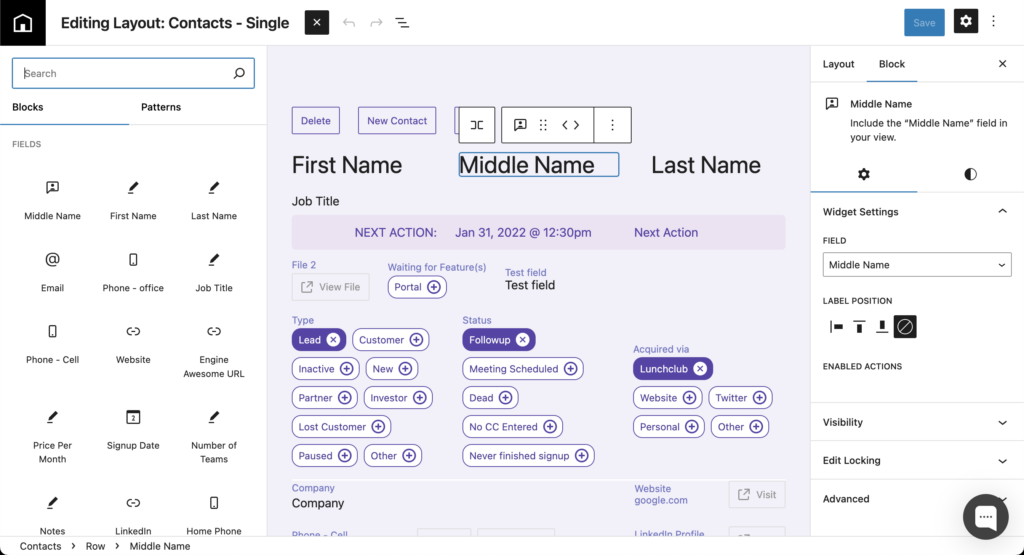
Find the “Middle Name” field, and drag it over to the Layout. Place it where you like.
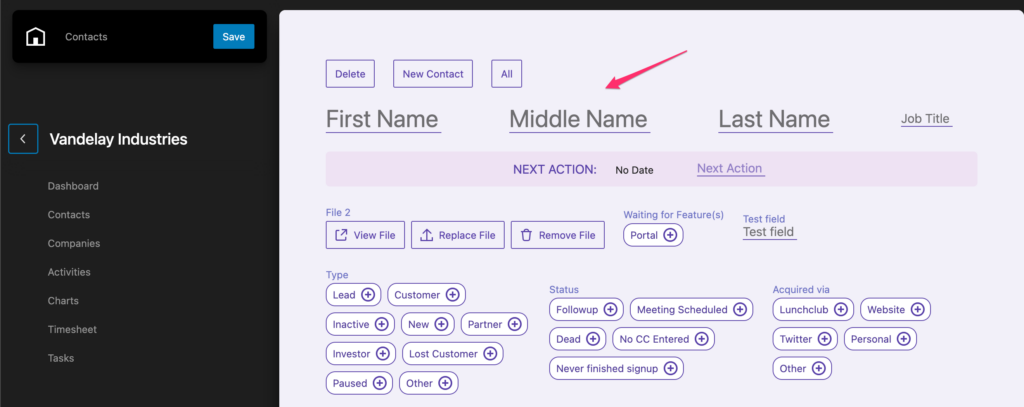
Switch to your application and use your field
- Text fields are flexible and can be used for a wide range of inputs, such as names, addresses, descriptions, or notes.
- You can customize text fields further by using validation or specifying maximum character lengths, ensuring that only valid data is entered.
Tip: For improved application performance, only select “Is Searchable” for fields you need to search frequently, as this feature adds indexing to the field.
